Monday, 3 July 2017

Love You Both

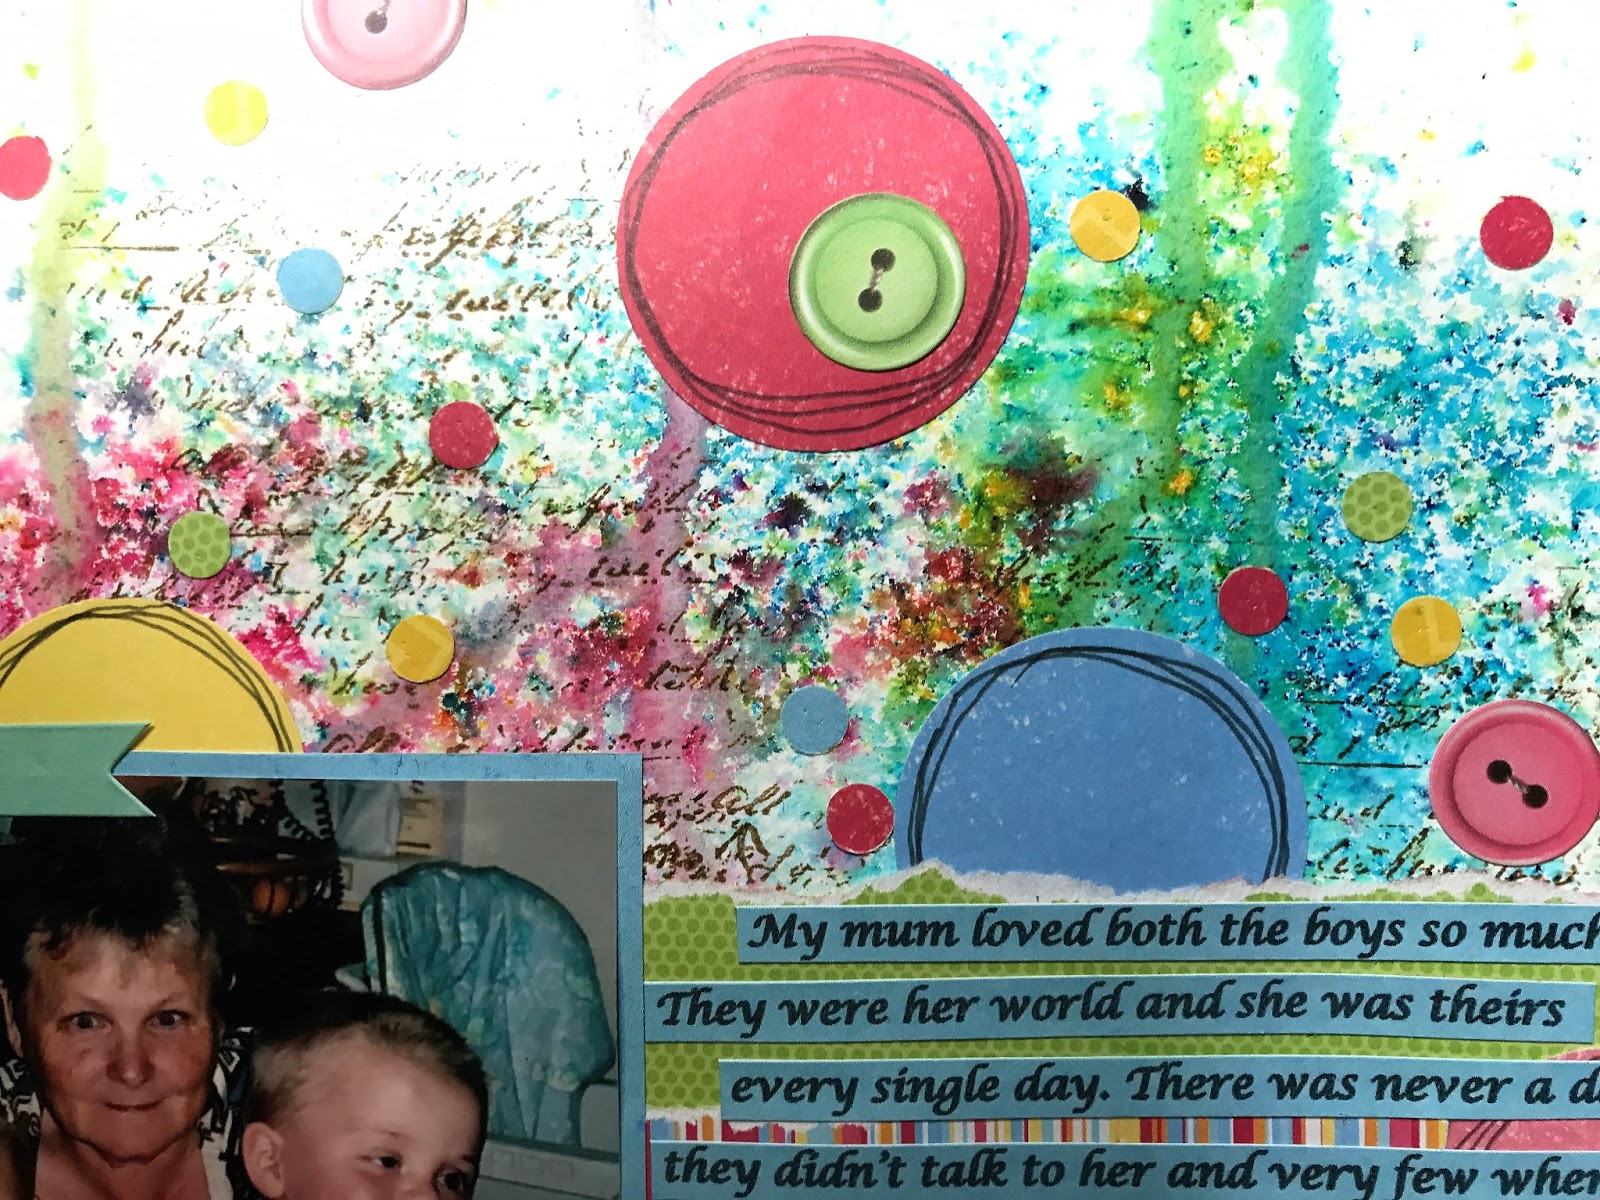
I would like to share with you my DT post for Colorful Creations and the colours for this challenge are awesome and they are still following the summer theme. I love how they all go together. The second part to the challenge is to include some journaling and you can see it on mine. Another DT member has done some hidden journaling. So there are different ways of doing it. 

No automatic alt text available.

Now for my page and the photo I have used are of my sons Riley and Harley with my mum Helen. 


I created my page on white cardstock and started my background using -
Tinby Designs Color Crush - Kiwi Fruit
                                              Raspberry
                                                  Blue Heaven
                                     Basil
                                                 Wheat Grass


Also on the back ground I used Kaisercrafts Clear Stamp - Script.
I also used a mix of Kaisercraft Patterned Papers from my stash. 

For the title I used both Kaisercraft Clear Stickers - Script Words and Alpha Stickers - Ebony. 


The buttons are from a Kaisercraft Sticker Sheet.

From the patterned papers I cut some circles and went around them with a black journal pen. All the smaller dots are from the same papers and I have used a hole punch to make them like little confetti.  


I hope you have enjoyed popping in to have a look at my latest DT page for Colorful Creations and that I have inspired you to hop on over to the blog and join in with the challenge.  I would love to see your take on it. 


Happy Crafting xxx

& Then There Was 3

Hi crafty friends and welcome to my DT post for the first challenge for July over at Let's Get Sketchy and boy is it a beauty. You have a mood board and a sketch so don't forget to use them both for the challenge as you could then be a winner. 
My inspiration was from the colour scheme and the big number three {it looked like a 3 to me} and the guys climbing the ladder {interpreted it as climbing the ladder to success} 


Now it's time for my take on the sketch and mood board. I chose photos of some very special friends of mine, the Bath family. Ebony and her sister Hayley have taken up the hand piece to crutch and shear along side dad.


I created my page on  Kaisercrafts Base Coat and the other patterned papers I used are by Graphic 45.
 

The ink is by Stampin' Up - Soft Suede. For the title I used a fussy cut & from the G45 papers and the other letters are by Pro Craft Alfa Stickers. 
 

For the sheep and hand piece I printed them from the internet and fussy cut them out. 
 

I hope you have enjoyed my page and please hop on over to the Let's Get Sketchy Blog and have a look at the other interpretations form the Design Team and then join in the fun with us.  
Happy Crafting xxx

Cards and Memory Pocket

Hello crafty friends and as always welcome to my blog. I would like to share with you my Meg's Garden DT post using the very beautiful Lavande Paper Range. These papers are just stunning and you can use them for so many projects.


The beautiful butterfly was fussy cut from the patterned papers and I used a punch for the smaller ones. I then inked the edges of them with a medium brown ink. Over a piece of plain cardstock I placed some Lavender Mesh Ribbon. These are great ribbons for all your craft projects and come in 8 different colours.


Once again I have created my card with cutting from the papers the beautiful flowers and placed it on some purple/blue pearl paper. I also used some of the same paper to run across the middle of my card. I punched our of the patterned papers a lace strip which I placed on top and then run some pearls through the middle. Once this was done I then razed the my fussy cut flower strip on some cardboard to raze it up. Beside this I place a beautiful Aubergine and White Apple Blossom Flower and used a rubon Love word. Around the outside of the card I lightly inked and then used a journal pen to do some stitching. 


 For this Birthday card I fussy cut the beautifully elegant lady form the patterned papers. She was placed over the top of some feathers as I felt they matched in well with her stunning hat. In the corner of the card I placed a Vintage Trinket Filigree Flower and them a lovely pink and green paper flower. All three I placed a large glass bling and then some small ones in each of the corners. 


Now it's time to share with you my Pocket Memory envelope. I have made a few of these now since my mum passed away. The doctor thought if I wrote things down that I wanted to talk to my mum about. It didn't matter if it was something new, past or just a feeling that it might help me with my healing process. I have continued it and its a way for my many thoughts to be placed somewhere. 
When this was suggested to me I decided since my mum loved my craft projects I would decorate my envelopes and write my thoughts on some tags. These are my latest ones. 


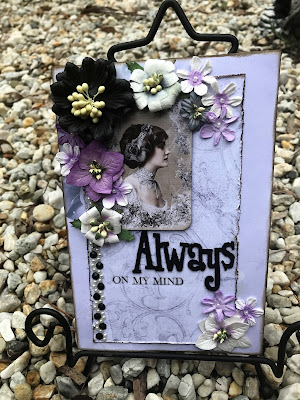
I have used the beautiful patterned papers on my back ground and to place my write up on the back. I do that on each one so it is there for my boys one day. The beautiful period lady I fussy cut from the papers and razed her up a little. I then used the beautiful Green Tara Fantasy Blooms - Lavender along with a strip of bling.
I fussy cut some tags for me to write my personal messages on to place the the pocket. As I write my thoughts on them I will fussy cut more and add them in. 


I hope you have enjoyed popping in and having a look at my Cards and Memory Pocket. The Meg's Garden store has all these beautiful papers, embellishments and more so please hop on over and have a look. Happy Crafting and please remember to call back as I'm always posting new creations and challenges for you to see and join in on. 
 xxx

Thursday, 29 June 2017

Dream - Canvas

Hello crafty friends and welcome to my blog today and my Crayon Canvas Tutorial for Off The Rails. I have been looking forward to sharing this with you as it was so much fun creating. Between me having this canvas done and my post I have been without internet for some time and this week a very sick son. All of this with selling our farm and buying a new home. It has been one very busy time. I'm glad to be back on line properly but the packing is cramping my crafting time lol.
So now for my canvas -


I have created the canvas for my eldest son Riley for in his room in our new home. Another of the things I have been busy with, selling our farm and buying our new home. He is so happy with the final result. Now for How I created it. 


When starting your creation you need a Canvas, Crayons, Hot Glue Gun and a Heat Gun (or hairdryer) and these things are for creating the background. I chose to use a 20" X 24" canvas but you can chose any size you want and just adjust your crayons to suit.
You need to make sure that you cover your work area extremely well as this can be a very messy process. With my work area I used cardboard from a TV box that I had saved. You can also use newspaper. When Heated the crayons can splatter.


After you have sorted out the order you would like to place your crayon colours you will need to use your hot glue gun and place them across the top.
Once this is done it's time for the real messy fun to begin. Standing you canvas up on your covered work area it is time to get out the heat fun or hairdryer. I chose my heat gun but you must keep in mind which every you choose the crayons will melt fast, a lot faster than you think. Depending on the distance you hold your heat gun and how much air comes out it will determine how fast the crayons will melt and flow down your canvas.


Once this is done it is time to decorate your canvas with what you would like. I'm big on dream catchers being in our bedrooms and decided that I would place one on Riley's canvas and being a boy and the fact he liked the bright colours I decided I would keep it simple, the colours already were speaking enough.  So the dream catcher and a word were going to be all I used on it.


To place the dream catcher on the canvas I also used my hot glue gun. Once this was done I placed the canvas aside and it was time to create my word - DREAM.
For the word I used Colorbok Monogram Punch-out Pack. The first thing I did was choose the colour I wanted to paint it. I picked Dylusions Pain - After Midnight. 

 
Once I had painted each of the chipboard letters and they were dry I then used my finger to place some Viva Inka Gold Colours here and there. The three colours I chose were - Lava red, Aquamarine and Champagne.


After this I then hot glue gunned each letter in place on the canvas. Now it was time to coat each of the letters with Glossy Accents and the finish looked great. Once the Glossy Accents were dry the canvas was finished and the canvas was ready to hang.  


I have another canvas that I have done and on this one there is no dream catcher. I have used the darker crayons and then placed a photo of my youngest son Harley and a few other bits and pieces. I thought I would add a photo of this canvas at the end just so you could see a different way they could be done. Harley's is a smaller canvas though. 
 

I hope you have enjoyed popping in and having a look at my canvas. Please call over to the Off The Rails Blog and have a look at other projects the design team have been creating. While there make sure you check out the monthly challenge and join in with us. 
 
Happy Crafting XXX

Friday, 16 June 2017

Follow Your Dreams

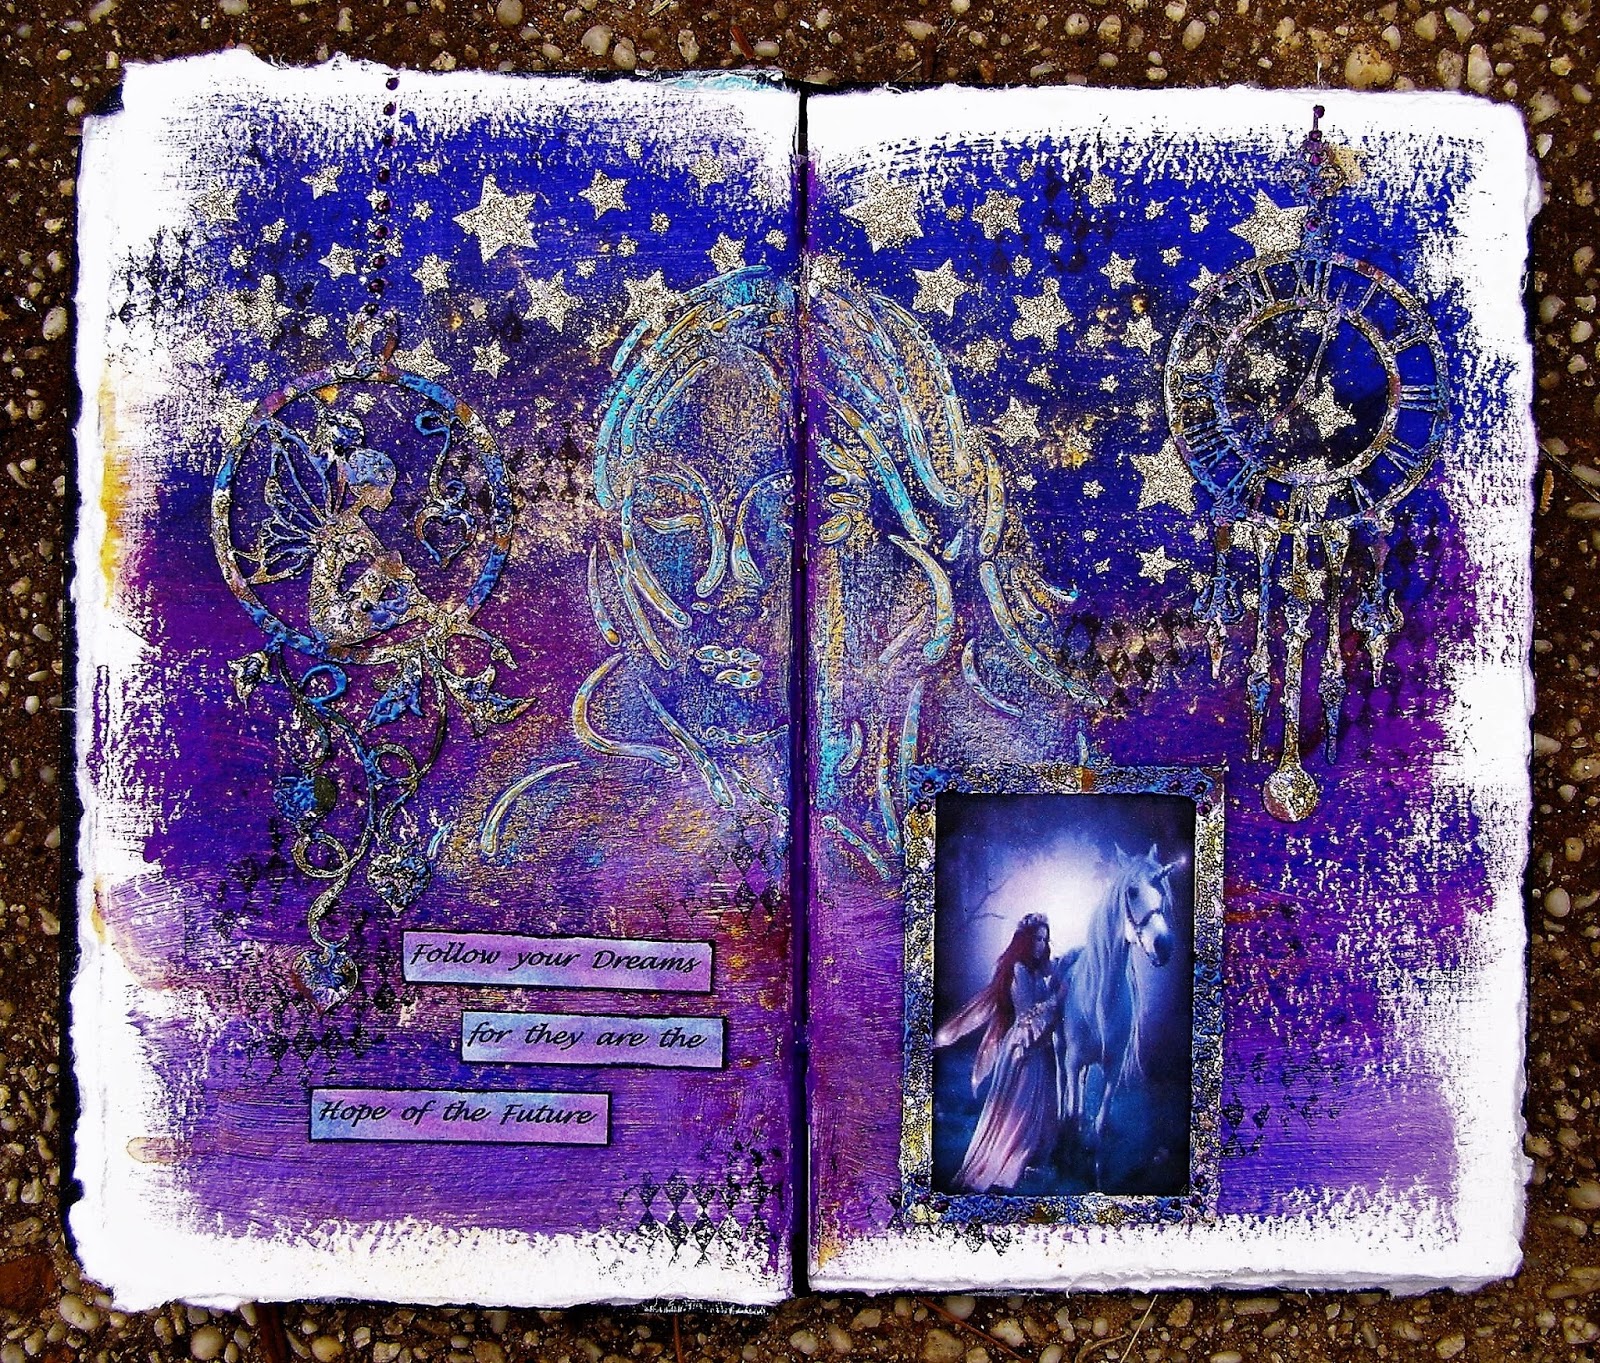
Check it out crafty friends, my latest Journal page for the challenge over at Archi-scraps.  All of DT girls have created something quite different from each other so there is some great inspiration at the Archi-scraps Blog. We would love you to pop on over and join in the challenge with us. 


You have probably guessed it - you need to have something hanging or a movable part. It could be a charm, a pull tab it's up to you. I chose to have two hanging dream catchers on my journal pages.


The products I used for these two journal pages are -
Gesso Primer
Wink Of Stella - Gold and Clear
Colour Blast - Royalty 
Dylusions Paint - After Midnight and Crushed Grape
Viva Ink Gold - Steel Blue, Violet and Old Gold
Liquid Pearls - Majestic Purple


Clock Dream Catcher chippie
Fairy Dream Catcher Chippie
Gelatos - Purple, Green, Royal Blue and Yellow
Pipe Dream Embossing Power - Aurora
Sunday International Glitter - Champagne
Lindy's Stamp Gang Magical - Sidewalk Chak and Glory of the Seas Gold


Dusty Attic Stencil - Stars
Texture Paste
TCW Stencil - Mini Mia
Chippie Frame
Stazon Ink - Jet Black
Kaisercraft Clear Stamp - Diamonds


I hope you have liked having a look at my journal and seeing what products I have used to crate it. Please make sure you hop on over to the Archi-scraps Blog and join in th fun with us. It's a great challenge and you could also win a great prize. 

Happy Crating XXX


Summer Fun

Welcome to my blog as always and my DT post for Colorful Creations and what a great challenge we have for you this second half of June. Check it out - 

SKETCH

MOOD BOARD
  

My take on the challenge combining both sketch and mood board. My page is of my girlfriends daughter Miss Meghan. She is so beautiful and I love this photo of her having summer fun at the park. It was such a beautiful warm day.


The products I used for this layout were -
White Cradstock
Patterned Papers by - Kaisercraft - Hopscotch Collection
Sticker Sheet - Kaisercraft - Hopscotch Collection
Washi Tape


Lindy's Stamp Gang Magical - Orange Creamsicle
Kaisercraft Clear Stamp - Tiny Dots and Crackle
Stampin Up Ink - Soft Suede
Distress Marker - Ripe Persimmon


I hope you have enjoyed looking at my latest page and that you hop on over to the 
Colorful Creations Blog to get some more inspiration and join in the challenge fun with us. 

Happy Crafting XXX