Thursday 29 June 2017

Dream - Canvas

Hello crafty friends and welcome to my blog today and my Crayon Canvas Tutorial for Off The Rails. I have been looking forward to sharing this with you as it was so much fun creating. Between me having this canvas done and my post I have been without internet for some time and this week a very sick son. All of this with selling our farm and buying a new home. It has been one very busy time. I'm glad to be back on line properly but the packing is cramping my crafting time lol.
So now for my canvas -


I have created the canvas for my eldest son Riley for in his room in our new home. Another of the things I have been busy with, selling our farm and buying our new home. He is so happy with the final result. Now for How I created it. 


When starting your creation you need a Canvas, Crayons, Hot Glue Gun and a Heat Gun (or hairdryer) and these things are for creating the background. I chose to use a 20" X 24" canvas but you can chose any size you want and just adjust your crayons to suit.
You need to make sure that you cover your work area extremely well as this can be a very messy process. With my work area I used cardboard from a TV box that I had saved. You can also use newspaper. When Heated the crayons can splatter.


After you have sorted out the order you would like to place your crayon colours you will need to use your hot glue gun and place them across the top.
Once this is done it's time for the real messy fun to begin. Standing you canvas up on your covered work area it is time to get out the heat fun or hairdryer. I chose my heat gun but you must keep in mind which every you choose the crayons will melt fast, a lot faster than you think. Depending on the distance you hold your heat gun and how much air comes out it will determine how fast the crayons will melt and flow down your canvas.


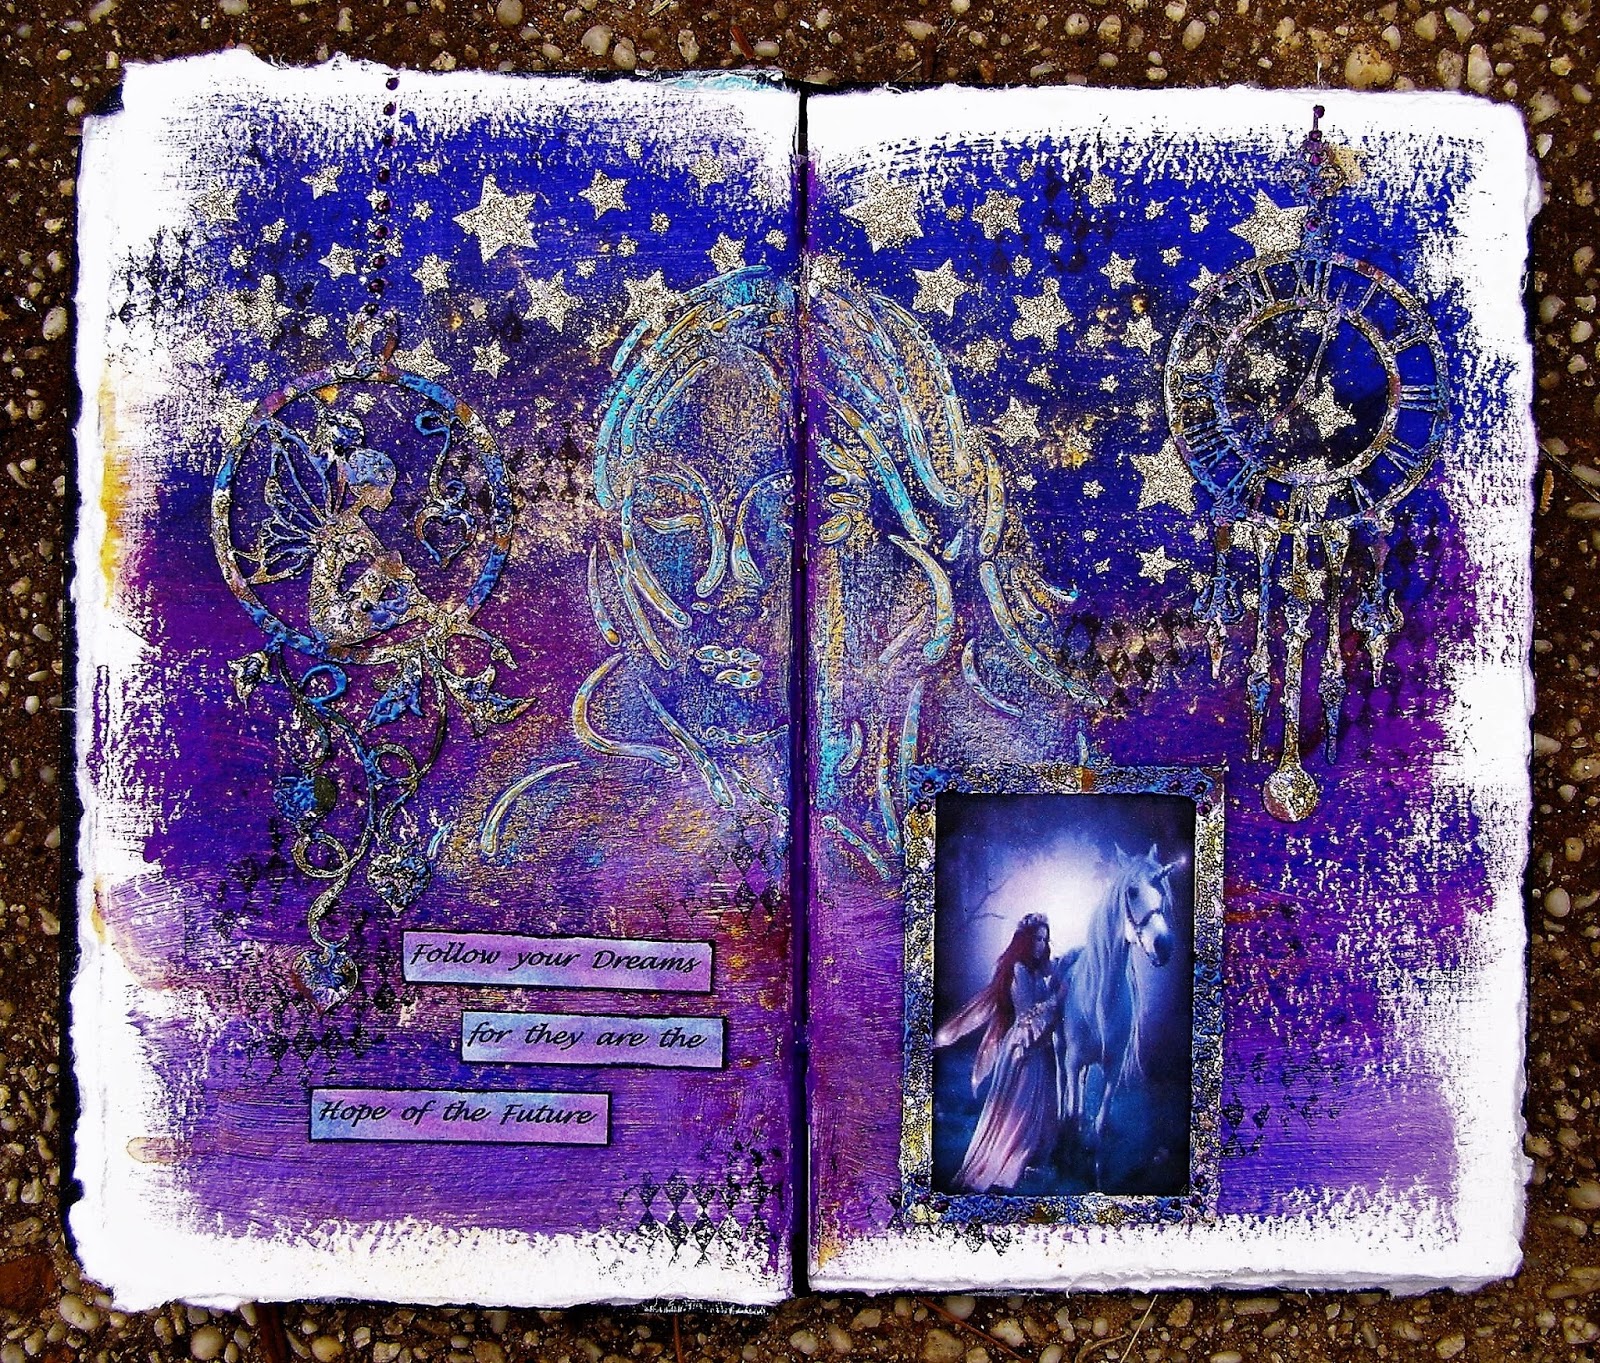
Once this is done it is time to decorate your canvas with what you would like. I'm big on dream catchers being in our bedrooms and decided that I would place one on Riley's canvas and being a boy and the fact he liked the bright colours I decided I would keep it simple, the colours already were speaking enough.  So the dream catcher and a word were going to be all I used on it.


To place the dream catcher on the canvas I also used my hot glue gun. Once this was done I placed the canvas aside and it was time to create my word - DREAM.
For the word I used Colorbok Monogram Punch-out Pack. The first thing I did was choose the colour I wanted to paint it. I picked Dylusions Pain - After Midnight. 

 
Once I had painted each of the chipboard letters and they were dry I then used my finger to place some Viva Inka Gold Colours here and there. The three colours I chose were - Lava red, Aquamarine and Champagne.


After this I then hot glue gunned each letter in place on the canvas. Now it was time to coat each of the letters with Glossy Accents and the finish looked great. Once the Glossy Accents were dry the canvas was finished and the canvas was ready to hang.  


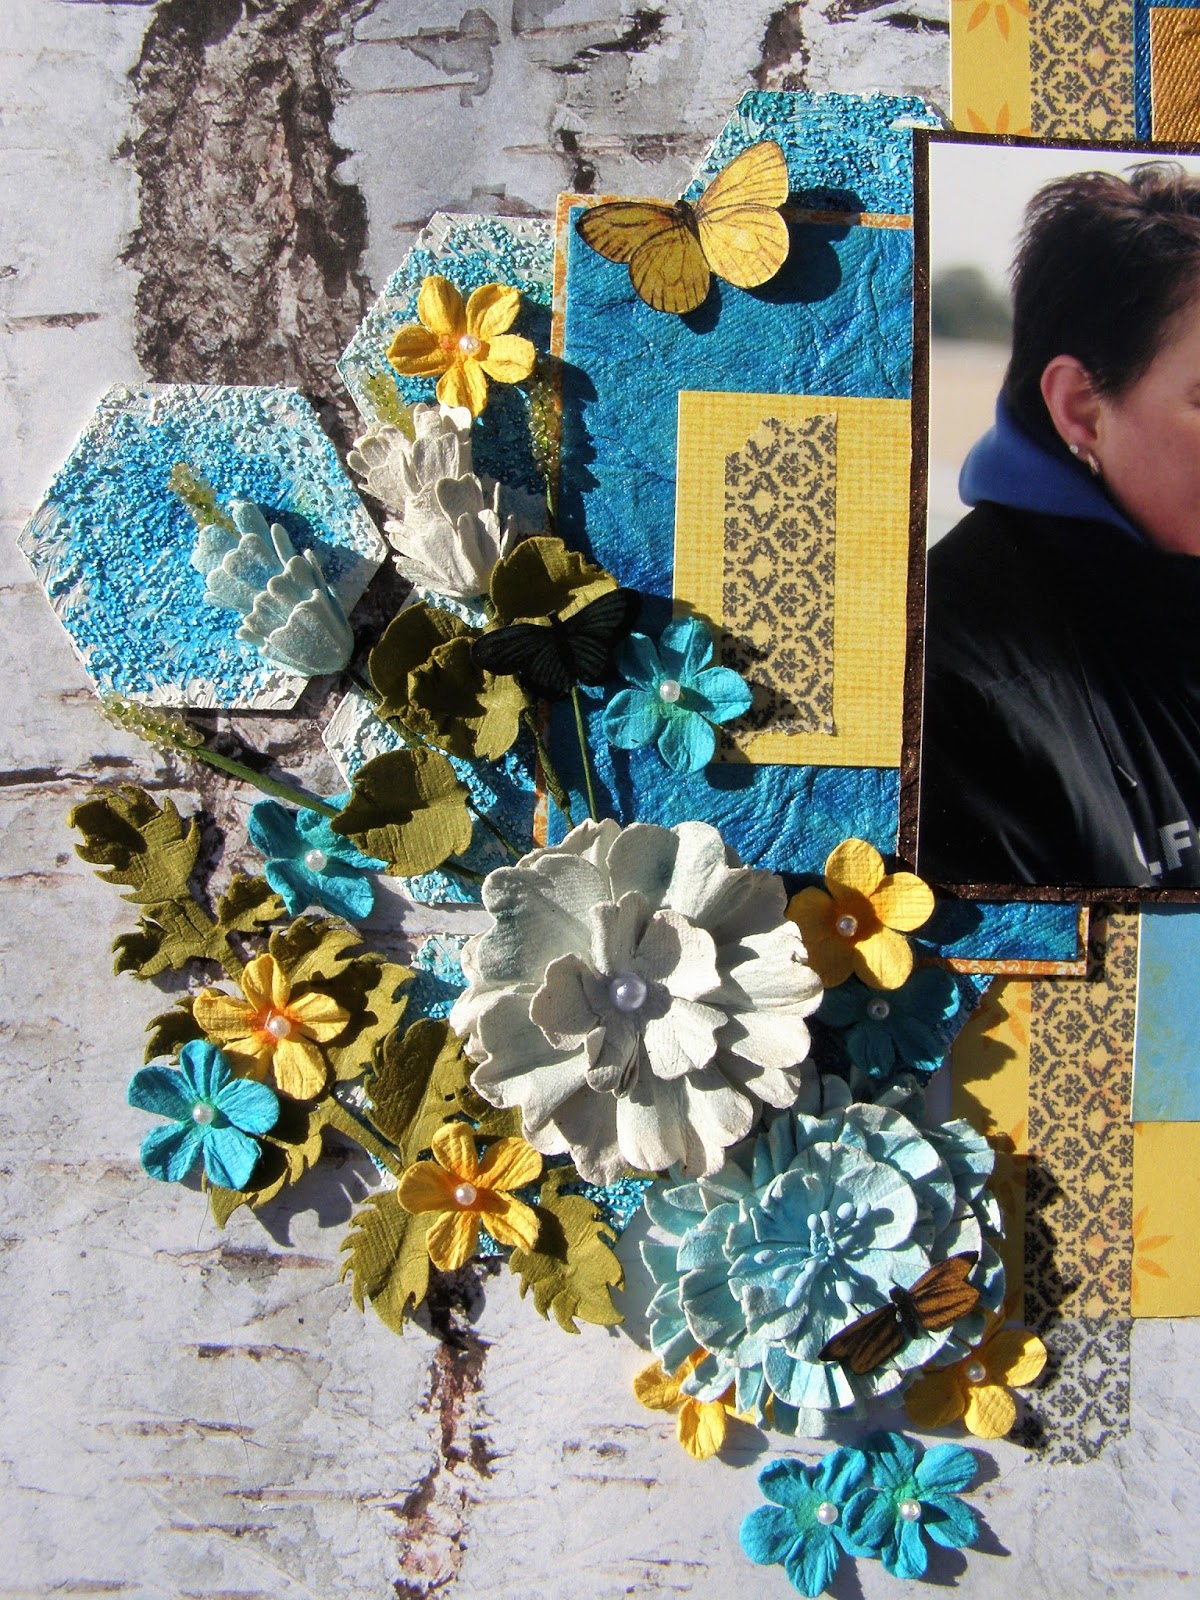
I have another canvas that I have done and on this one there is no dream catcher. I have used the darker crayons and then placed a photo of my youngest son Harley and a few other bits and pieces. I thought I would add a photo of this canvas at the end just so you could see a different way they could be done. Harley's is a smaller canvas though. 
 

I hope you have enjoyed popping in and having a look at my canvas. Please call over to the Off The Rails Blog and have a look at other projects the design team have been creating. While there make sure you check out the monthly challenge and join in with us. 
 
Happy Crafting XXX

Friday 16 June 2017

Follow Your Dreams

Check it out crafty friends, my latest Journal page for the challenge over at Archi-scraps.  All of DT girls have created something quite different from each other so there is some great inspiration at the Archi-scraps Blog. We would love you to pop on over and join in the challenge with us. 


You have probably guessed it - you need to have something hanging or a movable part. It could be a charm, a pull tab it's up to you. I chose to have two hanging dream catchers on my journal pages.


The products I used for these two journal pages are -
Gesso Primer
Wink Of Stella - Gold and Clear
Colour Blast - Royalty 
Dylusions Paint - After Midnight and Crushed Grape
Viva Ink Gold - Steel Blue, Violet and Old Gold
Liquid Pearls - Majestic Purple


Clock Dream Catcher chippie
Fairy Dream Catcher Chippie
Gelatos - Purple, Green, Royal Blue and Yellow
Pipe Dream Embossing Power - Aurora
Sunday International Glitter - Champagne
Lindy's Stamp Gang Magical - Sidewalk Chak and Glory of the Seas Gold


Dusty Attic Stencil - Stars
Texture Paste
TCW Stencil - Mini Mia
Chippie Frame
Stazon Ink - Jet Black
Kaisercraft Clear Stamp - Diamonds


I hope you have liked having a look at my journal and seeing what products I have used to crate it. Please make sure you hop on over to the Archi-scraps Blog and join in th fun with us. It's a great challenge and you could also win a great prize. 

Happy Crating XXX


Summer Fun

Welcome to my blog as always and my DT post for Colorful Creations and what a great challenge we have for you this second half of June. Check it out - 

SKETCH

MOOD BOARD
  

My take on the challenge combining both sketch and mood board. My page is of my girlfriends daughter Miss Meghan. She is so beautiful and I love this photo of her having summer fun at the park. It was such a beautiful warm day.


The products I used for this layout were -
White Cradstock
Patterned Papers by - Kaisercraft - Hopscotch Collection
Sticker Sheet - Kaisercraft - Hopscotch Collection
Washi Tape


Lindy's Stamp Gang Magical - Orange Creamsicle
Kaisercraft Clear Stamp - Tiny Dots and Crackle
Stampin Up Ink - Soft Suede
Distress Marker - Ripe Persimmon


I hope you have enjoyed looking at my latest page and that you hop on over to the 
Colorful Creations Blog to get some more inspiration and join in the challenge fun with us. 

Happy Crafting XXX 

Friends Are Special Treasures

Hello crafty friends and welcome to my blog. I would like to share with you my DT post for 
 I have created my page of my very special friend Dawn. She has been through so much in the last two years and come out the other side stronger for it. She is such an inspiration to me and I love her for being so beautiful and everything she does for me and my boys. 

Now for the challenge and my take on it, boy is it a great sketch.


The Products I used are - 
Patterned Papers - Mix of Kaisercraft
Glossy Accents
Imaginarium Chippies - Hexagons
White Gesso


Holcroft - Resin Sand Texture Medium
Lindy's Stamp Gang Magicals - Tint A Wheel Teal
Washi Tape
Memory Maze Title Chippie


The Paper Mill - Handmade Flowers - Yolanda Blue and Pearl Candy
The Paper Mill - Handmade Metallic Papers
Butterflies - Fussy cut from G45 Patterned Papers
Copic - Process Blue

 
Thanks for calling into my blog and looking at what I have been creating. There is more inspiration over at the Let's Get Sketchy Blog and we would love to see you join in with us. 

Happy Crafting XXX

Love

Wow what a month its been for my family with the selling of our farm, no internet or home phone and the boys both sitting mid-year exams and then I had my wonderful son Riley so sick with Glandular Fever. Internet and phone back on, farm sold, exams over (some happy results some not so happy) and Riley on the mend and back at light swim training and football umpiring. Looks like things are changing for the better. 

Now it's time to show you my DT post for 123 Challenge Blog and I just love this page I have created of my very handsome son Riley and his beautiful girlfriend Hannah. 


The products I used for my page are -
White Cardstock
White Gesso
Texture Paste
Iridescent Medium
Colour Blast Colour Paste - Snow White
Green Tara Flowers - Ivory Pearl
Imaginarium Chipboard Frame - Swirly


Kaisercraft Pearl Flourish
Kaisercraft Stencil
Lindy's Stamp Gang Magical - Merci Beaucoup Mint
Prima Decorative Heart Frame
Kaisercraft Love Rubon
Dusty Attic Chippie - Mini Words #1


I hope you have enjoyed stopping in and that I have inspired you to hop on over to the 
123 Challenge Blog and get some more inspiration from the rest of the Design Team. Once you have done that I'm sure you will be ready to join in the fun with us so we can see what you come up with and you never know you could be this months lucky winner. 

Happy Crafting. XXX

Thursday 15 June 2017

Forever Friends

Hello crafty friends and a big welcome to my blog and my first post done from home in 3 weeks. I finally have my internet fixed and it was not the most pleasant thing I had to do either. Wow when we pay for the service of phone and internet we think we would be getting what we paid for but this was not the case. But that over I can now get back into the swing of things. 

Before I share my Meg's Garden DT post with you all I have something very special to share -
We have sold our 220 acre farm and will be moving at the end of next month into town. Wow we are all so excited and can't wait. Big count down now....6 weeks and I'm sure it is going to go fast.


Now its time to share with you my post for Meg's Garden using the extremely beautiful Lavande Range. This range is just exquisite. My page has been created of my beautiful friend Eleanore who is always there when ever I need her. 

   
In creating this layout I wanted to show just how much can be done with basically just these beautiful papers below.


I loved making this page because the papers were perfect for fussy cutting my embellishments from. 
The only extra things I have used are Distress Ink and my rubon title. 
The other thing I used other than the patterned papers is the Mesh Ribbon Lavender. I used a doily die so I could use the patterned papers. I really do love making a page and utilizing the papers so much, especially when they are so beautiful.


I hope you have enjoyed popping into Megs Garden and having a look at my page and how wonderful these papers are to fussy cut with.
Happy crafting and remember you are able to get these wonderful papers and many others along with all the embellishments you could possibly need over in the Megs Garden Store.
Brenda XXX


Friday 2 June 2017

Beach Time - Coulorful Creations BLOG HOP

Welcome to the Colorful Creation’s I Love Summer Blog Hop.
  
You should have come from the Colorful Creation‘s blog.  If you have stumbled across this by chance and want to play along then you can head back to the Colorful Creations site to start at the beginning and to start collecting your challenge words. 
These words should be bolded on each DT member’s blog.  You visit each member’s blog and collect each word to complete the quote.  Once you have completed the quote, please leave it in the comment section of the Colorful Creations Blog Hop post.  

 This is my page for the blog hop and I hope you like it and will join in with us. 
My page has been created for a friends daughter Hayley and I love the photo of her taken on a beach trip with us. There was plenty of sandcastles and swimming that day and I love watching the kids on the beach while relaxing soaking up the sun and taking in the Smell of the ocean and the beauty all the while taking photos. 


Remember to play along in our hop challenge to win the wonderful prize from our sponsors, Let’s Get Sketchy and Crafty Chic Designs!


Thank you so much for visiting with me on the hop, next up is the very talented 
All you have to do is click on her name and it will take you straight to Rachel's Blog.

Have fun on the hop. Hugs Brenda xxx


Thursday 1 June 2017

1 Of A Kind

Hello Crafty friends and a big welcome to my blog and the Let's Get Sketchy June 1st Challenge and my take. What a great sketch we have for you to join in with. 
I have created my page of my lovely friends daughter Miss Meghan and she is such a sweetheart.

Now for the sketch and my page. 


Now for the products I used -
Kaisercraft Patterned Papers - Botanica Collection
Distress Ink - Frayed Burlap
Hole Punch (Made confetti size dots)
Journal Pen
Kaisercraft Sticker Sheet - Botanica Collection
Lindys Stampgang Magical - Steampunk Sepia
Memory Maze Chippie


Thanks for popping and and having a look at my latest creation. While here don't forget to leave me some love. I hope I have inspired you to join in with us in the challenge and you will find more inspiration at the Let's Get Sketchy Blog. 

Happy Crafting XXX